George McCormick's Growing Year
Rosedale Cottage Kirkconnal Dumfries
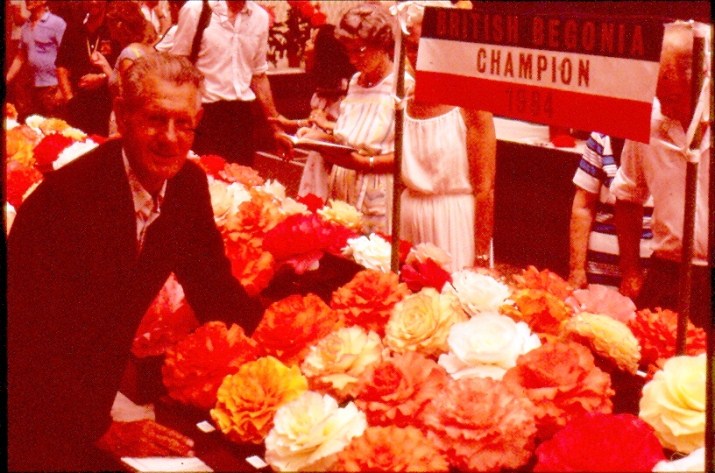
George with his winning 12 board at Ayr 1984
As can be seen in the above picture George has a history of growing begonias to a very high standard and is well placed to give a guide on the growing season of begonias.
Having considered your request for a month by month résumé of what procedure I follow in a complete growing year and, with nothing else to do, here goes. As everyone will have all their corms in store by the time this appear will begin my year in February.
February This is more or less the beginning of another Begonia season for some, as for me it is rather early. During this month it is a case of continually checking your corms. By the later part of the month I am busy making up my compost for starting away my corms. This comprises of equal parts peat and sand with the addition of "Chempak" seed fertiliser. This I have found is an easy way to start your corms. The first corms to start are your cutting corms, some growers box them up according to their size which is a good idea to follow. Personally, I put all my varieties together irrespective of size. You will find they are very erratic in starting, always some late starters and with having to water the growing plants I sometimes find the slow starters get rather too much water and just fizzle out. I start the cutting corms at the end of February or beginning of March.
March. For me this is the beginning of another season and the first week is spent in making up starting compost as already described. I now bring all corms out of store, give them a brush over with a soft brush and give them a soaking in a Jeyes Fluid mixture. This I find is a precaution against over wintering pests. Further to this I soak my boxes of compost with the same mixture. I find Roy Hartley is a very slow starter so with me it goes in first, around the 7th March, and around the end of March I start away the rest of my stock which have been sitting on top of the boxed compost a week previous to planting. Every day for a week I spray with water before I plant them and I find they are no time in showing pips. I may say I only bury my corms with the tops showing as this I find helps to overcome the chance of rotting and it's easy to check for growth.
April The early part of the month we are beginning to see pips showing and with increasing daylight growth becomes fairly rapid. By the later part of the month some corms are about ready to pot on but, prior to this it's time to get your compost ready. There is no doubt a good loam compost is the best and I have settled for the following compost. Six pails of loam, three pails of peat or leaf mould and two pails of rough sand with a pail size of two gallons. I add 8 oz John Innes base and 11/2 oz lime and an additional pail of old manure to each mix. If your loam comes from molehills be sure it comes from old pasture land and I would advise a sample of your made up compost (excluding the fertiliser) be given to your horticultural adviser for testing. It may cost you a few pounds but, in the long run, you will find it very much worth the bother. After this it's up to the grower
May Now we see rapid growth and are ready for potting up. You will find that the older corms will generally go straight into their flowering pots from 6, 7, or 8 in. diameter depending on the size of the corm. My cutting tubers can more or less move on to 3, 4 or 5in pots and I gradually pot on and flower them in a 5 in size. I always water in my plants after potting and this is a critical period as too much water can have a devastating effect on your plants. So before watering again lift every pot individually and test the weight or if using clay pots "ring them with a wooden mallet" if a high pitched ring then water is required. When growth becomes rapid I spray every day usually with a light feed incorporated in the water.
Summary February Time for final preparations with continually checking corms and get all pots cleaned and boxes sterilised with Jeyes Fluid. Bring all compost materials into heated greenhouse and have everything ready for an end of month start. Your cutting tubers go in around the end on the month and leave top visible. March Boxes of compost ready and sterilised with Jeyes Fluid. A week before planting.sit your corms on top of compost after soaking them in a Jeyes Fluid solution Spray regularly until planted and plant corms with tops visible and either put in a propagator or on the open bench with heated water pipes underneath. April If boxes are drying out too quickly cover with paper. Once plants start to make growth it will be advisable to attend to your shading. I use a mixture of one part emulsion to four of water. May Compost has already been prepared and your plants should be showing large root systems. After potting water your plants and be very careful with future watering. Lift your pots to check weight or ring pots with a wooden mallet. Spray every day with weak solution of Maxicrop and when you pot up you completely cover the tuber as this will facilitate further root growth. Compost There is nothing to beat the well tried method as regards to the soil content in your compost. Any chrysanthemum grower will tell you to do as follows:- Cut turf 3 or 4 inches thick and lay them down grass side down. Cover first layer with good layer of old manure then another layer as first and give a good dusting of lime. Continue on same lines until stock completed and leave for preferably a year. This will make an ideal basis for your compost and you will find the ph or lime content will be near enough to what I would consider ideal at around a ph of 6 For the benefit of novice growers who may not be used to the ph system it works like this. A ph of 7 is called neutral anything over a ph 7 is called Alkaline very few plants care for an alkaline soil. Anything below 7 is called Acid so the lower your ph the more acid your compost. Personally I like my ph to be around the 6 mark and if you use turf stacked as above you will find the ph coming out pretty near this mark. I think the ph is a very important part in your growing medium hence the value of a test. When you pot up plants be sure to crock your pots well.
June Now my plants are really starting to grow and I continue to spray every day with a light feed incorporated in the water. Owing to continued blotching of blooms on Fred Martin and City of Ballaarat I use Sangral in preference to Maxicrop as the iodine content in Maxicrop is thought to be the cause of blotching and colour running. Sangral was highly successful but unfortunately is no longer available so we will need to look around for something similar. You will now find cuttings available on your larger corms and the surplus can be taken off and rooted in a mixture of peat and sand. Open the ventilators on suitable days and as the weather improves the door can be left open giving maximum ventilation. Begonias don't appreciate coddling and are best grown cool if that is at all possible during the summer months.
July Now your plants should have nearly reached the flowering stage with buds on Roy Hartley being secured around the second week of the month as it takes roughly eight weeks from a shilling size bud to reach maturity with me. Most of the other varieties take roughly six weeks though Red Admiral takes only fully five weeks. Once you take your bud all spraying ceases and I continue with a half strength feed of Phostrogen on a weekly basis till I cut for the show. It is a general practice to grow one up :- that is once you secure the bud the growing point of the plant is cut out in the general belief that it increases the size of the bloom. Personally I have never found it this way as I grow two flowers on my older tubers. With one flower per plant all sorts of problems can occur e.g. double or rough centres. I find that two or even three flowers cuts down the odds in these respects plus the second flower can always come in at later shows. With smaller cutting tubers I grow just one flower to the plant for if you flower two or even three to the plant you will find your corm size will be affected at the end of the season.
August Now is the time to find out whether all your planning has turned out as anticipated. By this time your buds are starting to open up and you are wondering whether they are going to be early or otherwise. This is determined just as much by the weather. Last season I had my doors open all night but you have to be very wary as the night air is very high in moisture so be careful. All this time you will have been carrying out the practice of testing the pots by lifting or ringing when necessary. We now come to the moment of truth and show day is upon us with some flowers that we are trying to hold on to, down on the floor to keep them cool. Others could do with a few days more but we have not got those to give them so then comes the time we have been waiting for. I have specially made boxes that hold eight blooms at nine and a half inch centres with holes to fit a plastic cup which I fill to within one inch from the top. I cover the box with an inch depth of cotton wool and then am ready to cut my blooms. I cut with a little longer stem than necessary and I always put nine inch cardboard collars behind the blooms when they are oyster size. I leave the collar on as I find it greatly assists me at staging time. So with blooms cut, away to the show we go and I use a special water mix which Bill Green recommended as follows. To one gallon water add one teaspoonful of Milton, one teaspoonful Alum and eight teaspoonful of sugar or glucose. So with our cups filled, blooms cut to fit the depth of the cup, we put them on the bench and hopefully you will be laughing like hell when Hugh Gibb opens the show.
Summary The important part in this three monthly period is attention to your watering. If you let the pots dry out when in bloom then the bloom will edge. Also during this period you will get further cuttings from the leaf joints which can be taken with a cut down each side. Whilst doing so you will find an eye at the base of the cutting which it is advisable to keep. Treat your cutting with hormone rooting powder and root it in sand and peat.
September The show season is drawing to an end and we are now coming to the most important part of the season, that is if you wish to continue where we started off at the beginning of this monthly series. Under no circumstances must you now neglect your plants. Continue to give them even more attention if that is at all possible. Keep watering on a regular basis and I always give my plants a level teaspoonful of Sulphate of Potash to each plant and water it in. The reason for doing so is to assist in the ripening process of the corm and I give a little heat at night just in case we have a nippy frost
October Continue watering as and when required and don't withhold water until you see your plants yellowing on the lower leaves. Then you can gradually and I mean gradually reduce the water until the end of the month
November Your plants will now be beginning to shed some leaves and by this time water requirements will be minimal. By the middle of the month water requirements will be nil and your plants now accelerating the process of leaf drop. At this time I take about four inches off the top as I find this helps along the final process of ripening. By the end of the month most of your plants will have discarded leaves and stems although some may be a little reluctant to do so.
December With all your plants at rest we now proceed to take the corms out of the pots although some growers leave them in their pots. Personally I like to get them out, give them a rough cleaning and put them in store in a frost free environment January I give the corms a careful look over at least once a week, gradually reducing the old roots during these inspections. I have found any corms becoming unsound will have become so in the early part of the month. Some growers give their corms a wash but I never do until I am going to start them away as I have explained in an earlier edition. I hear you asking "do I not give my corms the usual form of hot water treatment recommended" the answer is NO It's not that I have anything against it but if I was going to do it then it would be just prior to starting them away. It would certainly encourage them to start but for no other reason than this. If you follow the method I have previously recommended you will find it a good deal easier and every bit as effective Summary Continue normal routine watering during September, give your plants a level teaspoonful of Sulphate of Potash and water it in. During October water as and when required gradually reducing until the end of the month. November will see your plants beginning to show signs of resting and by the middle of the month all water can be withheld. Take the top off your plants which will assist with the ripening process. December sees every plant at rest and corms can be harvested, given a rough brush up and put in a frost free store. January is the period of careful looking over your corms, gradually cleaning off old roots etc.
Now we are back to where we started, good luck and I hope this has been some assistance to the newer members.
Mr G McCormick

George was a very good hybridiser, he seen here with some of his seedlings
------------------------------------------------------------------------------------------------------------------------------